Tuesday, December 31, 2013

Last Post of 2013...Snow Globes Word Work!

I ran into my friend Kelly over the holidays and she told me that she wished like crazy that I would post again since it has really been ages since I've posted anything of substance on this blog.

She's right, of course.

The start of the school year really kicked my behind...new grade level, new partner, lots of changes at my school and in the district...I'm still not sure about my bearings, but I was able to pull myself together at least enough to fool the masses into believing that my head was screwed on straight.

So here's to 2013...and here's to Word Work and what you can do with your Word Work in 2014!

Enter...Snow Globes Word Work Stations!


These were super fun to make and share with my kiddos...and they turned out to be much tougher to work with than I thought.  (For the students that is.  For me, not so much!)

Finally, a Word Work station that can challenge your intermediates!  (Seriously, my kids had a great time with this, but they did find it challenging and it does require a medium-level attention span, so this would be a great station for your 3rd-5th graders.)

Dollar Tree had some of these great "craft organizers" hanging at the end of the craft aisle.  The larger containers have 6 in a package and the smaller ones have 8.  I purchased a gob of the 6-packs because I figured I might do something with these.  (After filling these up, I think that the smaller containers might not work well if you go the snow globe route...if you don't fill these with water, who knows?)


Anywho...I filled the containers with small letter beads that spelled out each word (i.e. r-e-i-n-d-e-e-r) and added some Dollar Tree Glitter and some holiday confetti that I picked up at Michaels.  Then I added water.  I numbered the top of the container so that I knew which word I had put in the Snow Globe so that I could create an answer key for the activity.

Storing the Snow Globes is really easy.  I picked up a small container (also at Dollar Tree) and was able to fit 12 Snow Globes in quite nicely.  (A little over $3.00 per kit.  Not a bad investment!)


I can totally see "pimping" these babies out to match your theme...winter...summer...spring...fall...holidays...ANY days!  There's always great metallic confetti, tons of different colors of glitter...lots of flotsam and jetsam...

I can also see possibilities for doing these with colored rice instead of water.  You'll just have to play with how much space you'll need in order to move the beads around in such tiny containers.

Baby food jars would also work, but I'm always a bit nervous when glass is handled by my kiddos.  Steve Spangler has these great little plastic test tubes (Baby Soda Bottles) that are a bit more spendy, but would also work well.  You can check these out on Steve's site by clicking here.  (Note:  I have a major "teacher crush" on Steve, so for me to even share him is, well, a little tough!  Be good to him...buy his stuff!)

I'm also including the Snow Globe Word Work sheet here.  Run copies for your kiddos and make sure to have them available at the station.  The kids can write the letters they find in the small snow globes on the page and then unscramble them to find the correct words.  (I use spelling words for this station.  You could use vocabulary from something you are reading, science words, math words, etc.)

I made two sets of the Snow Globes, one for me and one for my new partner, the Marvelous Megan.  Remember, sharing is caring, so why not make a set for you and one to share with your teaching partner, a new teacher, or someone who just needs a lift?  If you aren't feeling that lovey dovey, than why not send a link to this entry on to a colleague or friend and inspire them?  (I'd totally love you forever if you did that!)

Have fun playing in the "snow" with your kiddos and let me know how you plan to use these!  I love hearing from you!

Happy New Year to Kelly in Sheboygan and to all!

Nikki

Sunday, December 29, 2013

Favorite Winter Mentor Text Link Up


Oh...those Collaboration Cuties Amanda and Stacia don't disappoint, even over the holidays!  They are having a linky partay where everyone shares their favorite "winter book."


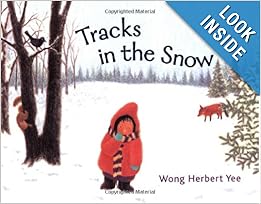
From the onset of my Readers Workshop, I share a book entitled Tracks in the Snow, by Wong Herbert Yee.  While this book isn't phenomenally engaging for my thirdies, it does serve as the foundation for my students to leave their own "tracks in the snow" while reading.

I teach my students how to question the text, make notes on unfamiliar words, and take general notes using sticky notes and placing these notes inside the text.  These "tracks" allow students to return back to important places in their reading and get the answers they need to make sense of the text.

We also use the "tracks in the snow" strategy with our Anchor Texts.  Each child receives a book that they can mark up by leaving their own tracks directly inside the text.  The "snow" is actually the white spaces on the pages.  We are currently reading Frindle by Andrew Clements and the kids are lovin' how many tracks they've made so far!

Why not check this book out and make your own "tracks?"

Nikki
uncommontothecore.blogspot.com

Gifts of Literature


Right before the holidays, my students and I had so much to celebrate...Christmas (of course!), the completion of our Writers Workshop Unit of Study (Informational Texts) and having four of my little honeys exiting their Tier Two intervention for reading.

Now, the exiting part might not seem really big to you, but to a kiddo who has always been considered "low" in terms of reading, this is a pretty ginormous thing!

So...when we return from the holidays, where do we go from here in terms of these readers who are finally considered "at level?"

We are continuing our journey together in the Readers Workshop, utilizing Anchor Texts, Mentor Texts, Mini Lessons, Into the Book Strategies and Independent Reading as the foundation of our reading program.  We are diligently adding to our BLBs (Book Lovers Books).  

It's time for the teacher to "up the ante" by pushing her readers towards more rigorous book choices for independent reading time.  No more gentle nudges and courteous nods for this girl...my strongest readers and my newly fluent "on level" kiddos deserve better.

It's time for...GIFTS OF LITERATURE!

I've been using this strategy in my classroom for quite some time actually.  

Call me what you will...Book Queen, Hoarder of All Things Bookish, Collector, Bibliophile...I LOVE BOOKS!  I have tons of them...much to the disappointment of my hubby and my librarian sister-in-law!

There's a part of me that enjoys sharing them immensely...and a part of me that gets pretty stinkin' ornery when they don't come back.

I have a smallish collection of my own personal books that never make it to my classroom library, but they are so good that I can't NOT share them.  So I've created a small book basket of personal loaners that are "by invite only."  These are the books that I "gift" my students with.

How do I do this?  

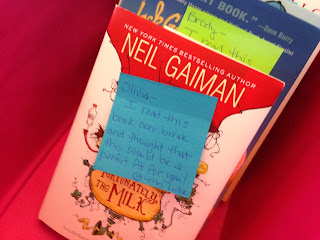
I start by writing out a short letter to the reader and then leaving the book on his/her table in the morning.  When they come into the room, they find the gift book and the note ( no pressure, just a vote of confidence that I have matched a good reader to a great book that will certainly challenge them and help them to grow!)  

If the student chooses to accept this gift, they keep it to put in their book baskets and read it during Independent Reading Time.  Since these are books I have personally read and enjoyed, the conversations we have in regards to these books are pretty great!   I'm better able to guide these readers through the challenges that each text presents to the individual and hopefully expose these readers to a higher level of quality in terms of text and book choices.  

Imagine the power this strategy has in terms of guiding your readers!  Think of the kids in your class who are strong and solid readers, but continuously go to the same "stuff."  In my room, kids have a difficult time moving away from Captain Underpants, Diary of a Wimpy Kid and Goosebumps.  And while these three series are great for bringing reluctant readers to the Readers Table, they aren't enough to sustain a reader for long periods of time and move them forward in their reading.

One of my readers, Brody, is so stuck in Junie B. Jones books.  Again, great series and well written books, but not enough to feed the mind of a kiddo with a 600+ Lexile level.  Brody is definitely a candidate for my "gift" basket.  I have a book with his name on it too!  (Brody is going to get a big push from me...period!)

What about the student who brings the book back to me and says, "Not interested."?  That's ok.  I'll keep offering different choices.  Eventually, I'll come up with a winner.  (I'm an optimist!)

Another terrific byproduct of this strategy...once other kids see these books, they ask if they can be the next person on my list to get the book.  It's really pretty cool!  (Note:  For the students on the waiting list, the next time we go into the school library, I find the book and share it with them.)

I've just read three AMAZING books over the holidays that definitely fit the criteria of "gift" books.  They are as follows:

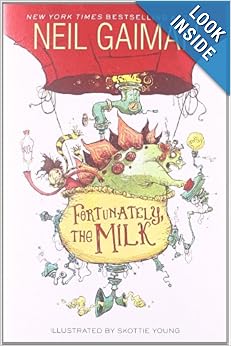
1.  Fortunately the Milk, by Neil Gaiman.  This quick read is one that your fantasy readers and "tellers of tall tales" will certainly embrace.  Enough pictures to provide a nice segue between the world of picture books and the intense world of chapter books, the text is rigorous and imaginative and would be a great fit for those creative readers and writers in your classroom.  (I have Olivia in mind...how about you?)


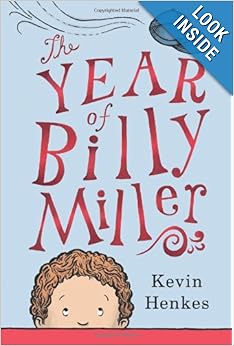
2.  The Year of Billy Miller, by Kevin Henkes.  This is a sweet little read that is split among the four individuals that are most important to Billy (Teacher, Mom, Dad and Little Sis).  Billy is a second grader with a ton of heart who is worried that he won't be successful in second grade.  This isn't a complicated text, but it is a bit beyond the world of leveled readers and it has a ton of HEART!  I think boys and girls would enjoy this read as it isn't overly "boyish."  (I'm thinking of Matthew who just exited from Tier 2.)


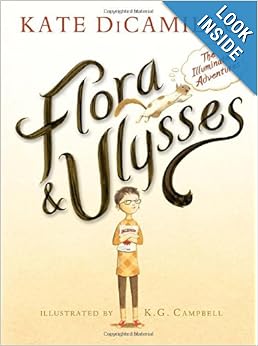
3.  Flora and Ulysses, by Kate DiCamillo.  Ok...say what you will, but in my opinion, this is DiCamillo's BEST BY FAR!  She definitely has the "people and animal formula" down to a science, but each time, it's just a bit different...unpredictable...This book is a spectacular read!  Your animal book lovers will think it is terrific. and it has great dialogue between the characters with a little mix of comic book format.  I love, love, love it!  (Note that this would be a terrific classroom read aloud and it is certainly going to make its' way into my Mentor Texts in reading AND writing!  Yup...it's that good!)  I'm thinking of my friend Mallory and what a good match this book will be for her.


Using the "Gifts of Literature" strategy, I'm able to point kids out to books that have the potential to be award winners and that they will certainly be exposed to along the way.

Other books that are in my "gift" basket are:


I highly recommend each and every book on this list, although not every one of these is appropriate for every reader.  The books in my "gift" basket are thoroughly read by me so that I truly know what the readability is and what the reader needs to have "emotionally" in order to tackle the content.

Here's your challenge:  What books would you put in your "gift" basket?  Which students would be your first lucky recipients?  I challenge you to go through your personal stash of books and find those books that should be matched up with readers.  Maybe you've changed grades, like me, and found that the books you used to read aloud aren't a great fit for your current grade level, but maybe there is a student who could use a push and the confidence instilled by having a teacher recommend a great book for them...

Oh, the possibilities!

Have fun learning and laughing with your kiddos!

Nikki


Saturday, November 2, 2013

Code Squad


I'm always on the lookout for great apps...and great apps that allow four kiddos to play and learn at the same time...KILLER!

I've been a huge fan of Operation Math.  With a secret agent code-cracking format, Operation Math is an awesome and engaging place to practice math facts for students at the elementary level.


Just when it couldn't get any better, the same folks at Spinlight come out with a new app, Code Squad!


The format is a bit different.  We're still practicing our facts, but with four agents seated around a single iPad, more kids are touched and the practice becomes a bit more competitive...in an interesting way!

Each agent is allowed up to 5 errors in computation.  A fact is flashed in the center and each agent gets the opportunity to answer it.  All four agents are really working together to keep facts flying and crack the code, but agents are "cut off" of play when they reach those 5 errors.  If at least one agent can keep rolling with the facts, play continues and a round can still be won.

With 20 secret agents and only 5 iPads in my classroom, you'd be amazed at the level of engagement and excitement in my classroom! 

Differentiation, engagement, and hands-on play for everyone...even with a minimal amount of iPads!  

If you are a teacher with 1-to-1 mentality but a 1-to-5 reality, Code Squad is the game for you!

I'm so hoping more developers/designers jump on board with a similar format!

Check out Spinlight here.  This app is also available for purchase on Nook and Android devices, so it opens up a whole great world of high-quality learning beyond the iPad!  Spinlight's site has great info and is also a place to purchase these apps.  You can also purchase the apps at the App Store!

It's the best $2.99 I've ever forked over for an app.

Give it a try...and share your feedback!  I'd love to hear what you think!


Nikki

Friday, August 30, 2013

Got Levels? Try Level It!


Got levels?  For those of us who level books in our classrooms to best meet the needs of our readers at their independent and instructional levels, we tend to rely on a few sources to help us level the trade books found in our classrooms and school libraries.  As a fourth grade teacher, I was constantly running to www.lexile.com in order to find Lexile levels for the chapter books that I was using in my book clubs and guided reading groups.

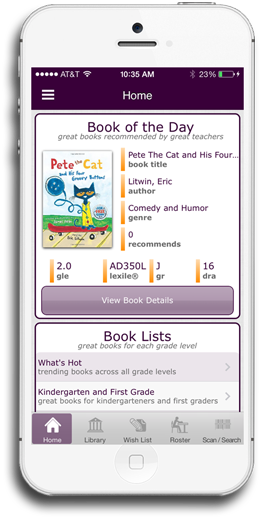
Lucky for me (and for those of you who level), the Level It app has made a solid and very useful appearance!  This app was designed for the iPhone and iPod touch devices, but it also works pretty well on my iPad.  

Not only am I able to find Lexile levels for a book, but a simple scan of the barcode also allows me to get Guided Reading levels (GR), DRA, and Grade Level Equivalency (GLE) levels.

I can also maintain my classroom library collection digitally and also check books out to students.  

There is a teacher feature that also allows me to recommend books to my students and their parents.  Again...very cool!

The app retails at the App Store for $3.99.  More information can be found at http://levelitbooks.com


So what are you waiting for?  Try Level It for yourself today!  


Nikki


Sunday, August 11, 2013

Must Read Math Mentor Text Linky Partay!


Oh yeah...I love this linky party.  It usually results in me amblin' on over to Amazon to get me a book or ten, but...no apologies...I. LOVE. BOOKS.  Period.

Amanda and Stacia over at Collaboration Cuties have been giving us all a great spot to check out new books and I am fresh off of a Lucy Calkins Reading and Writing Project week in NYC, so I am inspired.  On fire even.

The question is...which book do I share out?  There are just so danged many!

After much thought and deliberation, I decided on this beaut:


Being able to truly conceptualize large numbers is very difficult for young learners.  Heck...it's also pretty tough for much more sophisticated learners!

Andrew Clements (Frindle, The Janitor's Boy, and many many other fine texts) and Mike Reed team up to create a book that addresses numeracy is such a concrete way.

It's a long way to a 
million, right?
Of course it is.
But do you really know
what a million looks like?

This book truly shows a million dots with a ton of other really great facts that are provocative enough to get even your most skeptical critics thinking and learning!

One word...MILLION!

Check it out!

Nikki
uncommontothecore.blogspot.com


Monday, August 5, 2013

Monday Made It...Live from NYC!


Woo hoo!  It's Monday Made It time and I'm in NYC!  Holy cow!  Can't believe it!  Really.  I.  Can't.  Believe.  It.

I have the fabulous opportunity to learn from the best of the best...Lucy Calkins...at Teachers College.  The August Writer's Institute looks like it is going to be the bomb-diggity!  I'm looking forward to so much new learning...my head is swimming already!

(In honor of the wonderliscious time that I am sure to have in NYC , I plan on putting out a boatload of ideas that I have for mentor texts.  Do check back throughout August to see what I've posted, won't you?)

Anywho...thought I'd pull all of the stuff I've been working on together so that I don't experience the backup of projects.  I tend to feel that my posts have been a tad overwhelming being that I just shifted gears and am starting to panic about everything...new grade level, new teaching partner, new room, new Writers Workshop Units of Study...everything is just so danged bright, shiny, and new...I'm totally blinded by it all!

So...here's what I've been working on the last few days.


The Customary Catsups and Metric Mustards for my Footlong Measurement Center/Station.  I put these together and a while back.  Click here to see the original post.  I've been asked by quite a few folks where I got this idea from.  I can tell you...it's my idea.  I've never seen these before...they were just something that came out of my warped mind.

I put together a few extra to give to my new teaching partner and my "favoritest" teaching buddy, The Wonderful Linda!


A new "Random Facts of Weirdness" for 2013-2014.  My enthusiastic 12-year-old put this baby together for me.  He did, however, spell Weirdness incorrectly.  I took the picture and am posting it, but do rest assured that this is now spelled correctly.  You can find out more about how I use this by checking out my link to last year's volume here.


I finished up my "Pop Your Top" station with QR codes for Perimeter and Area practice.  The original link to the FREE coaster templates can be found here.

Here's something new...and either a real low point or a definite high point in my creative life, depending on how you look at things...

SENTENCE KABOBS!


I know...great idea, but your kids are sure to poke their eyes out!  (I'm envisioning Christmas Story dialogue here!)

Well, I am picturing that this will need a great deal of instruction on the front-end as to expectations at a station such as this.  (Note that I am also taking the bamboo skewers and cutting the sharp ends off.)  However, you're the teacher.  It's your call.  You don't need the skewer to make great learning and potential danger happen in your classroom.  This could be done with unsharpened pencils, shoelaces or anything else really.  The sky's the limit!


It really just started with a few empty Pringles cans and these great foam blocks that have been in my stash for a couple of years.  The blocks came from Michaels and were only a couple of bucks. I covered the cans with some scrapbook paper and these funky labels.  You can access them here:  

RED   BLUE   GREEN

Then I put two bamboo skewers in each can.

Using one of the skewers, I "drilled" holes into each block and used a Sharpie marker to write words on each block.  The red blocks have assorted nouns on them, the yellow blocks have assorted verbs on them and the blue blocks have a combination of adjectives and adverbs on them.  My suggestion is to build your own word list using the words you want your students to access and be accountable for.  (I'm low budget here.  I want to be able to help put an idea in your head by sharing some of my creative process, but I want you to build in what your students need.  I'm funny that way...I don't want to sell you anything...I just want to give away a little inspiration!)

By throwing a handful of these blocks into the can, my students now have a portable sentence creation station.  I want them to grab a yellow, blue, and red block and then skewer them onto the kabobs in an order that makes sense.  From there, I'd ask students what other words are necessary in order to have their "Sentence Kabob" make sense.  This would be a great opportunity to talk about pronouns, conjunctions, or any other part of speech that is appropriate to your situation.  

I see lots of possibilities here.  How about you?

I'd have the students write these down in their word play notebooks or on a whiteboard...your call.  You know what works best for you!

As always, remember that "Sharing is Caring" and that your willingness to make and give a set of these to a treasured colleague, wonderful teaching partner or "brand-new-fresh-out-of-the-box" teacher is always appreciated!

I'd love to hear what you do with any of these ideas!  

Have a terrific week!

Nikki

Tuesday, July 30, 2013

Have You Grokked Lately?


What a weird question, right?  If you've used instaGrok, then you know the answer to this and you can Grok with the best of them.

If this sounds as foreign to you as Klingon, then you have to join us in the world of instaGrok.

This web delivered app is an AMAZING way to help your students get a clearer view of what their research could/should look like.

CCSS plainly states that we are no longer teaching our students to write long, drawn out research papers.  The focus has now changed to "research on the fly."  instaGrok supports such standards and provides students with graphic and well-organized ways to pull research together.

instaGrok has "regular" and "classroom" settings available.  Might I suggest that you try these out to see what works best for you? 

All your students need to do is type in their "big idea."  I chose "cheese."  Then I hit return and instaGrok did all of the "grokking" for me.  My big idea now became the center of a brilliant graphic organizer that I can work with in...editing as needed.  There is also a nifty little "slider" that allows me to choose the level of difficulty/sophistication that I wish to conduct my research.  The great thing about this slider is that, if one of my students is struggling with way too many choices, a single slide allows the teacher AND student to customize the research.  

instaGrok helps provide plenty of ideas for narrowing research down...cheese has subheading of rennet, cheesemaking, curds, gouda and many others.  For less experienced researchers, this feature makes instaGrok especially appealing!

The Grok also brings up photos, videos and other web-based resources and puts them in an easy-to-use format along the left-hand side of the page.  The student can save his/her Grok and can send the teacher or a parent or classmate a link so as to share what they come up with.

I started using this with 4th and 5th grade students last year and my students loved the ease of use and the format.  Organization of research was never easier!  And, as a classroom teacher, conferring with my researchers was a breeze!  Really!

I'm moving my way to 3rd grade in a couple of weeks and I still believe that instaGrok is the way to go.  I can't wait to try it out with my new Minions!

Give instaGrok a try this fall!  You won't be sorry!

Nikki


Monday, July 29, 2013

Monday Made It...Whew!

Happy last Monday in July y'all!  I just spent the last week in New Orleans, Nashville and Memphis and I noticed a ton of signs that advertised school starting on August 1st.  HOLY COW!  I would definitely not be ready for that!  (For all of my southern friends who are starting school on Thursday, my hat's off to you!)

While I'm at it, here's a picture of my son down in the French Quarter.  He's painting a door that is being sent to Nelson Mandela:


It's time to link up with Tara over at 4th Grade Frolics for her...


Yeah...I've been a slacker...but I'm up and running again and wanted to get something done.  I got home from the most AMAZING vacay with my hubs and son on Friday night and then kicked things into high gear just so that I could post today.  (It wasn't too tough being that I could do things in between the MOUNTAINS of laundry!)

Here's what's been happening in my Monday...

Pop Star Reward Bingo

Note...this has been floating around out there for a bit on other blogs and on Pinterest and I've seen a few people try this out.  I'm not sure who to credit for this amazing idea...so whoever you are...thanks!  By the way...I subscribe to the idea that a good teacher is a great thief!


I fell in love with this idea the first time I saw it, so I had to try it!  I've seen it in neon with a black background and with lots of jazzy graphics, but that doesn't fit my "Road Trip" theme this year, so I went with black, white, and blue with some colorful pop bottle caps.  I want to do something else with it to add the "pop," but nothing's jumping out at me just yet, so here is my version.  (You can't see this in the corner, but I also built in my own dice for this!)

Shout out to my son, Noah:   He totally wanted to help out here and used some scrapbook rub ons to number these PLUS he wielded the hot glue gun to put the magnets on the back of the bottle caps.  Thanks buddy!

As for rewards...there are some really cute ideas out there and some sweet rewards cards that so many lovely folks have put together and I love love love them.  However, I'm the kind of gal that likes to ask my peeps what they'd like to earn...so I'll put my reward system together after the start of the school year.

Writers Notebook


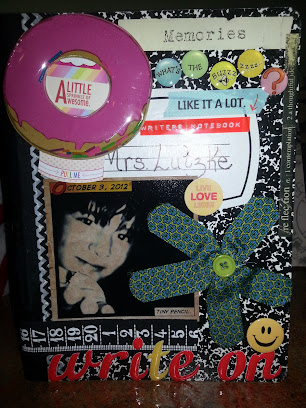
And yes...it's time once again to put together a brand new Writers Notebook.  I like to have this ready to go for "Meet Your Teacher Night."  That way, my students can see what they could do to "trick out" their Writers Notebook.  (This also gives parents a great visual so that they can help their honeys put this together!)  

I hand the basic composition notebook out when they walk into our classroom and ask the students to personalize their notebook and bring it back to school with them on the first day.  I can't wait to see what my kiddos bring back with them!

An "Eggcellent" Word Sort


Ok...this is another great idea from another terrific teacher out there.  I know I saw this out there in Blogland but alas...I have no specific person to name.  I've seen this printed out, but I did this one by hand and am not planning on marketing this with cute graphics.  This is just me and I'm just sayin.'

What you can see in the picture:  EGGS!  4 dozen mini eggs to be "eggsact!"  Each egg has two slips of paper in it.  These are word pairs.  For instance, one egg has black and white in it.  The student reads these two words and decides whether it goes into the "Synonym" basket, the "Antonym" basket or the "Homophone" basket.  (Note:  In the photo it's hard to see, but there are 4 baskets.  The first basket is filled with eggs.  The second basket has a "Homophone" mini file folder in it.  The third has a "Synonym" mini file folder and the fourth has an "Antonym" file folder in it.)

The students at this center then decide which basket the egg belongs in.  At the end of the activity, they can check their work against the answer key in the file folder.  (Oh how I love a self-checking learning center!)

I'm leaving this wide open since I can see possibilities for math (primes/composites, factors of even numbers/factors of odd numbers)...

Instead of creating a list of words, I chose words that my third graders might encounter in their reading.  I'd highly recommend personalizing your choices as well.

BTW...all eggs and baskets came from my favorite place:  the Dollar Tree!  I had a few mini file folders laying around, so I added those to the mix.

Word Boxes


I've been working on these a bit and BIG PUFFY HEART LOVE how they turned out!  It's a different take on "Making Big Words" which I adore.  I just don't like the time it takes to cut out all of those squares...even if the kids are doing it.

Anywho...I made 5 boxes in each color so that the entire class can use these in small groups.  If you've never used Making Words or Making Big Words before, it's really quite simple...letters are placed on individual cards so that students can manipulate words and explore "words within words" on their own or in small groups.  There is really one giant word in each box, and the students try to figure out as many small words as they can while working to determine the big word.  My kiddos have journals for this and they love it!

I also put together the first 13 weeks worth of these boxes...I can't wait to use them.

The boxes came from a favorite place of mine:  The Container Store.  Each box meaures 2 x 2 x 3/4" and costs 69 cents.  I bought mine online, but if you are lucky enough to have a Container Store close by, they can be found in the gift wrap aisle.

I picked up 12 x 12" scrapbook paper in coordinating colors and just cut each square into a 1 1/2" ...if you do this, you'll get 64 squares per sheet of paper and you won't have to waste any by punching these out!

I have lots of other things I've worked on and my phone cam isn't cooperating, so I'll just have to wait until next time to share the rest.

Don't forget to share the love with your colleagues...some of these were a little pricey and a little more time consuming, so if you don't want to put these together for everyone, don't sweat it.  Do share when you can!  You'll be glad you did!

Nikki


Thursday, July 18, 2013

Bloglovin!

Finally...I'm on Bloglovin!  And I must say, I'm lovin' it!  Special thanks to Melissa at Common Core and So Much More for her wonderful tutorial on how to change the basic button over to her super-cute button!  I love it!

If you are looking at changing up your Bloglovin' button, I'd highly recommend checking this out:


Hope you are having a wonderful day!  And if you aren't following my blog on Bloglovin', WHAT ARE YOU WAITING FOR?  Get on board already!

Nikki

Monday, July 1, 2013

Monday Made It...Just Ketchin' Up!


Ok...I'll admit it...I haven't been inspired as of late.  But this morning, I took a sneaky peek at all of the great posts out there and I must admit that I was quite inspired to put a seed of an idea into play.

I bought these goofy little ketchup and mustard bottles at the Dollar Tree last summer and thought that maybe these might make an interesting addition to some sort of learning center.  I shelved them for a bit and then ran across them as I was putting my room in order and...well something clicked.  Literally.  I actually felt the lightbulb snap on and so...

These goofy things were born!


It's the FOOTLONG MEASUREMENT STATION!  

I had a feeling that if I put some light string into the bottles and tied the ends that I would get a bottle that "shoots" the string out when it is squeezed.  My little brain tied itself around this idea and it really worked!

HOLY HOT DOG BATMAN!

Here's the scoop as to how to make these babies:


  1. Cut a 15" length of lightweight string.  I used kite string.  (Note:  Kite string can be "colored" using spray ink that you would use in scrapbooking/papercrafting.  I used Heidi Swapp's Cherry Red Spray Ink and October Afternoon's Lemon Drop Sprinkler to get these colors.  They also do a great job coloring hair...in case anyone is interested!)
  2. Tie many many many knots into the end of your string to keep "ketchup" or "mustard" from shooting out of the cap.  
  3. Thread the end of a needle and drop other end of string into the cap and out the top of the nozzle.  
  4. Tie many many many knots into the end of the string that is coming out of the top of the nozzle and fray the ends...for giggles mainly.
  5. Create labels for each of the bottles.  I used "Customary Catsup" and "Metric Mustard."
Note:  While I am a HUGE FAN of funky spellings, I simply cannot endorse spelling words that students need in testing and in other places incorrectly.  That is why I went with "Customary Catsup" instead of "Kustomary Ketchup."  My kids need to see these words spelled correctly.

Your students can use the Customary Catsup to practice their customary measurement and the Metric Mustard to practice their metric measurement.

I also included a spot on the recording sheet to extend students thinking...mean, median and mode.  I may just add range...again...for giggles.  It's great practice either way.


I am always on the lookout for great concept stations that allow students to practice those skills and strategies that are taught at the very end of the year.  In the math series my district uses, that means measurement and probability.  However, our state tests are administered in November, so that means that these concepts usually test a bit low.  MAP testing also has quite a bit of probability and measurement...again...if these concepts aren't covered early on, it's a bust.

So I just thought that I'd put together an engaging (technical meaning:  fun!) way for my third graders to practice their measurement skills.  I've never been a big fan of giving a kid a ruler and then sending them out to measure arbitrary objects or practicing on drawings on a math worksheet...so this little station will fit the bill nicely.

Not only that...it's actually fun!  I tested it on my soon-to-be-seventh-grader and he couldn't keep his hands off of it!  His comment:  "Why don't we get to do cool stuff like this in algebra?"  (That's a challenge, by the way!)

Noah came up with a ton of great game ideas that could be played after completing the center sheet that you'll find here.  My suggestion would be to run this sheet as a 2-sided paper or laminate one of these and use with a Vis-a-Vis marker or dry erase.

As for Noah's game ideas:  why not try to have 2 students "duel" and see who comes closest to 6 inches?  Noah also suggests have students try to come up with the shortest measurement squeeze or the longest. I'm sure there are plenty more where this came from.  If you have any ideas, I'd love to hear them!

Thanks for checking out my blog and this goofy goofy post!  And remember...if you are taking the time to make one of these for yourself, why not take time to make a second for your teaching partner?  (My new third grade partner, Megan, has no idea what's coming her way!)  And while you are at it...make a third for a wonderful teaching buddy...like the Wonderful Linda (my mentor and fourth grade partner!).

This was actually super-cheap and really easy to do...so why not make a few extra?  I'm sure your teaching pals will RELISH the opportunity to use a center like this in their classrooms too!  (Sorry...had to do that!)

Happy Happy Monday!

Nikki

Sunday, June 30, 2013

Appy Hour...Technology Training With a Twist


Oh my gosh...can't believe it's the end of June and I have yet to post something of substance!

I've been involved in quite a few trainings lately and am trying to make sense of all of the great apps that are out there...not just iPad/iPod apps but truly legit apps available online...those great spaces that rock my world and make my head spin!

Not doing that...not today...no head spinnin' will be caused by me today.

I'd like to, instead, plug a great way to share out technology with your friends and colleagues.

Enter..."The Appy Hour!"

Really...this is just about the best way to share out a great app with the fine folks that you share a passion for educating our kiddos using technology.

The format is simple really:  Just send out an invite that encourages your friends/colleagues to show up at a great place (your classroom, the school library, teachers lounge, favorite coffee shop/offsite hangout) for just a few minutes to learn a little bit about a fabulous app.  You can choose to offer refreshments and tunes.  And don't let the "hour" part fool you.  My friends and I got these down to about 20 minutes.

It's informal...it's fun...and it's an energizing format at the end of a long day of teaching/learning.

Nothing fancy...just another reason to get "Appy!"

The best part is that this is a training format that is simple to pick up and a great way to encourage staff members who don't fancy themselves "techie" to share out and take over some training responsibilities.

I started this last year at my campus and invited "guests" to host an Appy Hour themselves.  This became contagious and over the course of the year, quite a few teachers, counselors, and other staff members became Appy Hour hosts themselves.

As you are relaxing this summer, consider getting Appy Hours rolling at your school!

Enjoy the last few moments of June!


Nikki

uncommontothecore.blogspot.com

Wednesday, June 26, 2013

How's It Going?

Wow!  It's sure been quite a while since my last post!  End of the year activities kicked my butt and so I've taken a brief vacay from the blog but I'm itching to put something new out there.

My school and district has moved in the Lucy Calkins Writers Workshop direction recently, and we've put together a nifty crew of folks that compile The Literacy Committee.

Part of our crew is currently in NYC learning from Lucy and the fine folks at The Teachers College.  I'm jealous, but I get to go in August, and I'm getting a little antsy!

Over the summer months, we have given ourselves an "assignment" of sorts.  As a crew, we developed a list of books that we feel enhances and supports the Writers Workshop model and we've dedicated ourselves to the task of reading FIVE BOOKS over the summer months!  Holy cow!  What were we thinking?

You should have seen us going through the "buffet line of books!"  We each picked up the five books and then it was like a room full of "kids in the candy store!"  You know how we teachers love our books...  :)

These are the books on our summer reading schedule:


I'm a bit partial to How's It Going? since this is the one that my team and I are "going deep" with!


My group is reading How's It Going? by Carl Anderson.  We're going to have some discussions here and also at a Today's Meet that I have set up at http://todaysmeet.com/conferring

We'd love to have you join in...either here on this blog or at Today's Meet!


Hope your summer is just smashing!  


Nikki


Friday, May 31, 2013

Great App for Teaching Symmetry


Recognize this face?  I use this image to teach my fourth grade students about symmetry.  Of course, Abraham Lincoln was known for his asymmetrical face, and the above image showcases lines of symmetry beautifully!

(An added bonus:  I teach at Abraham Lincoln Accelerated Learning Academy, so my students are extra enthusiastic about this lesson!)

In the past, I've had my students snap photos of each other and then run off multiple copies plus "flip" copies so that we can create similar images of the students with a left side+flipped left side image, the original photo in the center, and a right side+flipped right side image.  The kids love this activity so much, but it is REALLY TOUGH to accomplish in a single math period.  It also can become a tad confusing and usually it takes a student a few tries to get this correct.

In the end, we put the images onto a large set of classroom posters entitled:  The SymMEtry of ME!  When posted in the hallway, they're a real crowd pleaser.

I'm always on the lookout for ways to incorporate great apps into my curriculum, so imagine my surprise when I found an app that could take a student's photo and create symmetrical images...

Enter Face Symmetry Tester HD for iPad.  This FREE app allows the user to take a photo and then create images with the left side and right side of the face.  What used to take my students over an hour now takes 20 minutes for a class of 25 kiddos.  PLUS...I can make a cool slideshow of the students since the images are saved with my photos.  How cool is that?

Here's a sample of one of my lovelies...Rylee!  This is what she created:


Face Symmetry Tester HD is an excellent resource that you and your students are sure to love!

Enjoy!

Nikki

An Uncommon to the Core Teacher

Sunday, May 12, 2013

Made It Monday-May Edition

Holy cow!  I can't believe it is time to link up with Tara over at 4th Grade Frolics for another Made It Monday!  If you haven't checked out what all the hubub is all about, you need to...it's just that great!


As my fourthies and I are becoming more familiar with CCSS, we are also finding lots of ways that CCSS and Smarter Balance are different than our current state tests.  The "ante has been upped" and questions are certainly a skosh more robust than what we are used to.

Case in point:  questions involving area and perimeter.  Gone are the days when the diagram gives you the measurements on a quadrilateral.  The questions contain more steps and require students to dig a bit deeper.

In trying to prepare my kiddos for the rigor and reach higher than what is asked, because that's really what I'm aiming for...giving my students much more that what they need and really encouraging them to think beyond...I put together today's Made It.

I'm living the dream...truly.  (No sarcasm here.  I love what I do and I love my kids.)

So enter the "Pop Your Top" card decks.  I'm giving you access to the file of four pages with teacher notes here.

I bought these great tin coasters at Target in the Dollar Spot for $3.00.  They were a little spendy, but so stinkin' cute that I walked away with 6 packs of them!  They had "classroom learning center" written all over them!  Of course, when I opened them at home, they had this written on the inside:


While I do love the sentiment, these do not make for wonderful center tools...unless you alter them a bit.  Here's my take on them:


You could also create a small deck (think Spot It) and use them as flat disks or back them up on cardboard coasters in order to better reinforce the cards.  Lamination in this is instance is, of course, a must.  I used the great tin coasters that look like ginormous bottle caps.

I left the activities open a bit for teachers to use as they see fit.  I totally envision either earning the cards by completing them correctly or even a match it game for your advanced learners.  I have this 24-card deck set up to be played either way or...better yet...come up with your own version!  (There are 12 pairs with identical answer/responses that could be matched up!)

The answers are embedded into the QR codes, so a reader is a must.  (Always looking for a technology hook...it satisfies my inner geek!)  I used qrstuff.com as a resource to make the codes.  It works really well!

So what are you waiting for?  Why not download this deck and get a move on!

Happy Monday!

Nikki

Sunday, May 5, 2013

Language Arts Must Read Mentor Text Linky: Arnie the Doughnut

It's Sunday, which means another great linky party with Amanda and Stacia over at Collaboration Cuties.  This is always an opportunity to learn about great books that really work in the classroom.

Why not join in the fun by clicking on this link?


A favorite of my students is Arnie the Doughnut, by Laurie Keller.


Where to I begin to sing the praises of Sweet Arnie?  He's a doughnut who doesn't realize that his job...his sole purpose for being...is to be eaten.  So, when the nice man comes and takes Arnie away from his cozy home in the bakery case to his new home, a comfy "bed" is created with a soft napkin on a lovely plate...and then...

You get the picture.

I use Arnie the Doughnut to teach the following:

  • dialogue
  • point-of-view
  • tongue-in-cheek humor
  • puns/plays on words
Arnie's just too stinkin' cute to not use.

He's a great read aloud with lots of little "side commentaries" that make the kids laugh out loud.  (I can never have too much of that!)

So put yourself and your kiddos in a sweet mood and pull out Arnie the Doughnut today.  He's a sweet treat you'll find yourself going back to again and again!


Have a Sweet Sunday!

Nikki