Monday, July 30, 2012

Monday Made It #7


Holy cow!  Is it already time for another Monday Made It?  It's hard to believe that the week has already flown by!

For as much as I was an overachiever last week, I feel like a complete and total slacker this week. (Don't freak out...I do have a couple of Monday Made Its way at the bottom of this post, so stay with me!)

What have I been doing?  Well...you know how all teachers have a list of things they wish to do over the summer?  I've been putting off so many little things that I really want to do with my son while he is still young and doesn't mind hanging out with his mom...

So, I had a list of things I absolutely had to do with my eleven-year-old that just won't wait for another summer and we did them...this week:

1.  Go to a real DRIVE IN MOVIE!  This has been on my summer list for the last four summers and I decided that I would never ever forgive myself if another summer went by without doing this!  So, the hubster and I packed up the car and put my son and his buddy in the back seat and headed out to see the new Batman movie.  We all loved it and the boys loved the whole drive in movie experience!  We will definitely do this again next summer!


2.  Hit Six Flags Great America in Gurnee, IL...REAL HARD!  Noah's never been there, and if you are a parent of an "only," like me, you know that sometimes it isn't the most fun to ride a roller coaster, screaming your little heart out, next to...your mom!  (Dad's a puker, so this is never really an option!)  Anywho, we were able to go to this amazing amusement park with a buddy and his family and had an absolutely, positively AMAZING DAY...that included absolutely no puking!  This is another experience that we must repeat next summer!


3.  Go get ice cream...OFTEN!  We had ice cream every day last week and I don't regret a single scoop or calorie!


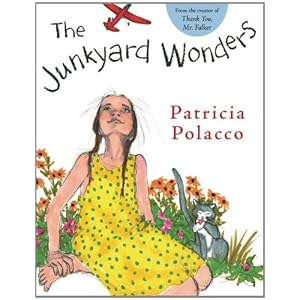
4.  Read a book with my son.  Noah and I have done this a few times.  I buy two copies of a book and we read and discuss...for fun!  This year, Noah chose the book.  I wasn't sure how much I'd like it, but it was THRILLING!  We went out and bought the rest of the set.  Noah's almost done with the third book and I'm still working at number two, but this has been so much fun!


So...if you have a list of stuff that you've been putting off until "tomorrow," what are you waiting for?  Seriously.  This has been a week that has been positively great for my soul!

My Monday Made Its are certainly less than inspiring.  I did put together a couple of containers of the "Smart Beads" that have been invading Pinterest as of late.  There are lots of different ways to put these together.  I found these cute little "teacherly" paper buckets at WalMart for less than $1.00 each and filled them with Mardis Gras beads that I had laying around the house and a few extra I picked up at Dollar Tree.  I also used some letter stickers from my scrapbookin' stash to put labels on the buckets.  Of course, I made a set for the "Wonderful Linda" and a third set for a 6+1 Trait Workshop that I'm conducting this week.  I thought that I'd try this approach with workshop participants and then finish off by giving the set away as a door prize.  (Sorry that my photo is less than wonderful!)


If by chance, you've been living under a rock and haven't seen these, the idea behind Smart Beads is relatively simple:  when you want to recognize a student for sharing something, or coming up with an idea that hadn't occurred to you, or whatever you want to recognize your students for, hand them a strand of Smart Beads.  They can wear them all day and hand them back in at the end of the day in exchange for a classroom reward.

My apologies to the source of such a swell idea for not being able to figure out who you are and giving you proper credit!

My second Monday Made It comes from Stephanie over at Fifth Grade Dugout.  She showcased her "Big Inflatable Baseball of Science Reflection" and I was all over it!  I'm always looking for ways to help my students better reflect on what they have learned, and the "Beach Ball Reflection" is a terrific way to make this happen!


I know, I know...you can actually BUY these at your favorite teacher store, but I prefer Steph's reflection items over anything you can find out there.  (Not only are these cheaper...Dollar Tree...but the questions are better!)

Instead of doing this exclusively for science, I chose to do this for nonfiction reading and/or any topic introduced in the classroom.

With a nod to Stephanie's baseball and the questions that were on this, I wrote the following questions on the ball:


  • I'd like to share the best part of today's class with you.  It was...
  • A question I still have that I'd like answered is...
  • I didn't know that...
  • I wish...
  • Three important ideas from today's reading/topic that I'll remember are...
  • Rate your understanding of today's reading/topic on a scale of 1-10 (10=I'm an expert!)  What can you do to improve your understanding?
Just like Stephanie, I think a reflection like this would be great during the last five minutes of class.  I can also see using this like an "exit slip" and passing this off to each team of students before they get to leave our classroom.


Don't forget...sharing is caring!  Do make a duplicate for an amazing friend like the "Wonderful Linda!"  You won't regret it!

Nikki

Sunday, July 29, 2012

First Day Jitters


I love love love the book First Day Jitters!  I am definitely planning on using it to start my school year.

I found Ashley Nicole's blog hop and I felt like this was one to climb on board!  Click on the cute graphic above to check out her cutie patootie blog!

It's hard to believe, but I'll be starting my 21st year of teaching and I hope that I never lose those butterflies that still fill my tummy after all of these years!  I think I'm really worse than the kids.  

I guess you could say I'm hopeless!

Here are my three jitters, in no particular order:

1.  We welcome a new principal to my school this year.  Five years ago, my wonderful principal and friend, Tina, brought me on board and gave me a chance to teach "my dream job."  After 15 years of teaching, I had never taught 4th grade and was really excited to finally be able to teach at that level!  It seems like I had taught everything but 4th.  Anywho, I know my new principal will be terrific, but Tina really understood my strengths and weaknesses, so it is scary to feel like "the new kid" all over again.  Because really, when new leadership arrives, we are the new kids all over again.  We have to prove ourselves to someone new.  I welcome the changes my new principal will bring, but there's an element of anxiety added to the mix.   That part's scary...

2.  I'm having surgery done next week, and I may not be able to start the school year with my kids.  I'm nervous and frightened...but I know that this is something that needs to happen and, in the end, everything should be for the best.  That doesn't take away the scary...

3.  I am the mom of an eleven-year-old son who is the light of my life.  I am married to my very best friend.  I am always a little nervous at the start of each year as to what sorts of obstacles will stand in our way, how we will learn from them, and what part of each experience will make us stronger and better people.  May we always rise to the occasion!

Monday, July 23, 2012

Monday Made It #6


Ok...lots and lots of Monday Made Its today...so let's get started!  (I was a little bit of an overachiever this week, so stick with me!)  I actually had a few more ideas to share, but I'll save those for next week and give myself a week without creating something new...NOT!

Shades of Synonyms

Have you ever done those "dead words" with your kiddos?  You know, substitutions for the word "good" or the word "bad?"  I've personally done the dead word activity, complete with headstones, as part of a lesson on using the thesaurus to find synonyms for those words....or if you are a 6+1 sort of person...Word Choice! 

Independent practice of this skill in the form of a center activity will give me more time to work with my writers...that headstone activity takes up a lot of time and gets...old.  Student practice here is important!

Anywho...I have created this cute little center called "Shades of Synonyms."  Playing off the cute colors of these ADORABLE little lucite boxes that I picked up at The Container Store (love this joint!), I put together an activity that is based on a great vocabulary activity I picked up at one of the sessions offered at The Model Schools Conference in Orlando last month.


The presenter had us write 1 word on a sticky note with a total of 12 sticky notes.  Each word was a synonym for another word.  Think wonderful, terrific, brilliant, nice...all for the word "good."  Then, working together in a small group (partners, triads or foursomes), the group focuses on the words and puts them in order, kind of like on a paint chip sampler, with the lesser intense (weakest) word at the start and the most intense (strongest) word at the other end.  

The conversation we all had about the "word strength" of the words in the activity was pretty animated and lively and, at times, we checked out the meanings of the words and reset our rankings!  

Rigorous and relevant it was!  (This is a Model Schools thing...maybe your district or school is a part of this!)

To make your own Shades of Synonyms:

I have prepared two sheets of words with some synonyms that you can download, just by clicking on the list number. I felt that 12 synonyms for one word might be a little daunting for my 4th graders, so I culled the list to 7.   List #1 and List #2 have the lists that I have prepared for this activity.  Additionally, there is a word work sheet that you could prepare and laminate for your students, or, if you are like me, we keep a Word Play notebook and your kiddos could use a similar format...your call!  Find this word work sheet here.

In making the little lucite boxes, I just used 1 1/2 inch squares (using a square punch) and wrote the words on these little cards made of cardstock that I had in my scrapbookin' stash.  They were quick to make and my little sweeties will love handling these!  

If you'd like, include a box with a dictionary and thesaurus as this would be a marvelous opportunity to reinforce using these tools.  If you have technology readily available, do allow your students to use www.dictionary.com as another tool.

In my opinion, there are really no wrong or right answers that would require an answer key (unless having an answer key makes you feel better!).  In my classroom, the discussion that students would have in working their way through a Synonym Box would be plenty to observe and evaluate!

All the Colors in the Crayon Box Investigation:  Vocabulators...with a twist!

I've seen something called "Vocabulators" out in Blogland for quite a while.  Tara over at 4th Grade Frolics has them prominently displayed and has some great "how to" information on these wonderful word manipulatives.  Check out her blog entry here for more info.  There are others out there, but Tara's is my "go to" on Vocabulators and their uses!

I tried something similar with these mini paint cans from The Container Store.  I did find out the hard way that gumballs are a little heavy for these cans, so you really need to secure the bottoms and tops.  Hot glue works well here.  Then I put in the words.  You could use heavy cardstock or make little word blocks out of Fimo clay...I prefer the "Shrinky Dinks" medium myself.  I stamped the words on the Shrinky Dinks and threw them in the oven for about 2 minutes.  They turned out cute.  Here's one of the Color Cans for you to see, up close and personal!


Click here to get the recording sheet to go with the All the Colors in the Crayon Box Investigation Center!

The colors I used were red (scarlet, ruby, cardinal, crimson, vermillion), orange (tangerine, apricot, coral, salmon, cataloupe), yellow (gold, goldenrod, citrine, amber, blonde), green (emerald, chartreuse, loden, forest, olive), blue (azure, sapphire, periwinkle, cobalt, indigo), purple (amethyst, plum, violet, magenta, lilac) and pink (carnation, blush, rose, rouge, fuschia).

You could certainly choose your own shades.  I just went for color words that often pop up in a fourth grader's reading.  It seems to me that kids are always coming up with a question like "What's crimson?"  Expanding that vocabulary could never hurt!

Random Facts of Weirdness

Ok...I did take a little liberty here with a play on "Random Acts of Kindness."  You all know that our kids are prone to picking up the weird, strange, and just plain odd facts that are floating around out there. (Think about the cute kid from Jerry McGuire, telling Tom Cruise how much the human head weighs.)  It seems like every morning, I get at least one little honey telling me something interesting.  Unfortunately, when you are trying to wrangle kids, collect homework, respond to notes from home and send lunch money to the office, these great facts get lost.

Enter Random Facts of Weirdness!  Last year, I decorated a composition notebook with a goofy pair of glasses and some neat scrapbook paper and text and set it out in my classroom for my students to collect these weird facts.  The student writes their name, the date, the interesting fact and where they found that fact.  (Sidebar here:  This is a great place to work with students on citation and great resources!  Sometimes, we find that we hear these interesting things on the radio...and radio is truly a source that is valuable!)

Eventually, the Random Facts of Weirdness takes on a life of it's own, and my students start seeking it out during silent reading time (Oh my goodness!  We can find facts in our independent reading...even fiction!), center time, math, science, and Morning Meeting time!  Any time of the day is an appropriate time for Random Facts of Weirdness!

When it's finished for the year, the previous version makes its' way to a place of honor in your classroom library.  I love that each year's class has the opportunity to make such a contribution to our classroom library!

Here's the 2012-2013 version:


I just picked up the composition notebook and the goofy glasses at Dollar Tree and attached using a hot glue gun.  The text stickers came from my scrapbook stash.  

Writer's Notebook

My wonderful 4th/5th grade team was fortunate enough to attend an AMAZING Writer's Notebook workshop series two years ago.  Aimee Buckner is a fantabulous presenter and was so inspiring!  She recommends that teachers keep a Writer's Notebook alongside their students.  Here is my third (I can't believe it!) Writer's Notebook.  


I show this to my students on the first day of school and then send them home with their own composition notebooks.  They have three days to personalize their notebooks and bring them back to share.  

We use the Writer's Notebook to collect seed ideas, lists, and the like.  It's a place where we send our ideas to germinate and we "harvest" those ideas when we need to take our writing to a published piece of work.  The kids love it and I'm always thrilled with their response to this notebook.

My colleagues and I have developed an approach that allows us to take this notebook to the next level.  Flip the notebook over and upside down, and then have your students record writing "mini lessons" in the back.  Your Writer's Notebook becomes much more functional as a resource for grammar and 6 Trait features, entered by the student no less!

Check out Aimee's book for more information about using the Writer's Notebook.  It's a quick read with lots of great ideas!


Teacher's Organizational Tool (TOT)

I've been seeing these binders all over Pinterest and have been dying to put one together.  Of course, each teacher has his or her own system, but this idea really does put everything together in one handy and super-convenient place!

I considered the digital version of this, until I came across these really great binder dividers at Staples.  I pulled everything together with some cute polka-dot frames and added a few finishing touches from my scrapbookin' stash to create something that's really going to work for me.

Here are a few pix of the finished product:


Keep Calm and Teach

Every year, I put together a little Back to School gift for my team.  This year, our school's theme is "Rock Star."  I turned to Melanie over at Schoolgirl Style and found her Rock Star theme.  She had these really cute "Stay Calm and Teach On" graphics, suitable for framing in her Teacher's Notebook store as a download.  I believe I paid less than $5.00 for all eleven color choices in one easy-to-use PDF.  

So, after downloading and printing these cuties, I mounted them on some great glittery paper and put them in frou-frou frames (IKEA, $2.50) for the girls and I to use as part of our rockin' good theme!  Lots of fun and really easy on time and the wallet!


So, if you are feeling the pinch and need a little decorating inspiration, stop by and check out Melanie's blog.  You'll be glad you did!


Don't forget...sharing is caring!  I made a second set of each activity for my friend, "The Wonderful Linda!"  How about you?  Could you take one of these ideas (or any idea from a Monday Made It) and make a duplicate for a colleague/wonderful wonderful friend?

Here's to a creative and fun week!

Nikki

Sunday, July 22, 2012

Looking for Cheesehead Bloggers


It's like a 12-Step Program..."Hi.  I'm Nikki.  And I'm a teaching blog stalker."

I've been out there, really looking at some pretty amazing blogs out there since the start of last school year.  Prior to that, blogs weren't really on my radar.

Anywho...one thing I've noticed is that there are these "blogging communities" that actually get together from time to time.  I've watched in awe as these wonderful groups from Florida, Arizona, California, Florida and Texas connect live and in person.

I've also noticed that bloggers from other states are out there too...but there doesn't seem to be quite the numbers that these other states have.  And, to the best of my knowledge, I have yet to run into a Wisconsin teacher blogger...

So...I'm asking the question, "Are you a teacher blogger from Wisconsin?"  If not a blogger, then a blog peruser or blog browser?   These two sound much nicer than stalker, don't they?

If you are a Cheesehead, drop me a quick email or, better yet, jump on board and join my followers!  We may never be able to have a really cool Florida beach day or a fiesta on a great riverwalk in a giant state, but we can always connect at a tailgate in the future.

Ya!  Who knows?

Nikki

Friday, July 20, 2012

Newbie Bloggers Blog Hop


I ran across this Blog Hop while looking at Blogger Brigid's "Must Have Picture Books" list. Brigid's Daily Lesson Log has some sweet little ideas on it. Stop by and say "Hi!"

I am joining a "Newbie Bloggers Blog Hop." Janis from Grade Three Is the Place For Me started this linky party this past Wednesday. I think this is a great idea for all of us "newbies" to connect! We will all be able share ideas and give suggestions! Link up if you can...SUPPORT each other!

Sooo what are you waiting for....LINK UP!


This is what you need to do:

1. what state you are in


2. your current teaching position


3. your teaching experience


4. when you started blogging


5. share a blogging tip / blogging resource


Here's my information:

1. I live and teach in Wisconsin.


2. I have been teaching 4th grade for the last five years. This has always been my "dream position!"


3. I just finished my 20th year of teaching. I've taught 2nd, 3rd, 4th, 5th, 6th, a multi-age 5th/6th grade PLUS 7th-9th grade technology.


4. I started putting together my blog in March, but I didn't "put it out there" until June.


5. Give yourself plenty of time to figure out how blogging is going to fit into your busy life! Before jumping into big endeavors, figure out timing by actually trying. An example is the "Monday Made Its" at 4th Grade Frolics. I'm trying this during the summer and am finding out that this is a pretty time intensive endeavor...plus, it's addictive! Also, make friends with the "Schedule" feature in your blog! This allows you to "post date" your blog entries at busy times!


Tuesday, July 17, 2012

Must Have Picture Books Linky Party


The Teacher Wife has a really great linky going on right now.  She's asking teachers/bloggers to link up and share their TOP FIVE favorite picture books.  All I'm thinking right now is  "That's cool!  I can't wait to share!" AND "Oh crap!  I can only share five?"

Oh well...this is no slap in the face to all those terrific picture books out there...you are all wonderful.  But...if I have to narrow it down to five, then here goes (in no particular order):

1.  Hooray for Diffendoofer Day! by Dr. Seuss, Jack Prelutsky and Lane Smith


All of us have felt the "pain" of standardized testing.  Although I'm not sure this is really what the great Dr. Seuss had in mind, Prelutsky and Smith put such a timely spin on this tale that it has become a standard in my class prior to our state testing.  Miss Bonkers and I share the same philosophy:  teach kids how to think, and you put them at a distinct advantage not just on the test, but in life.  I want to be Miss Bonkers when I grow up!

2.  The Junkyard Wonders by Patricia Polacco


Polacco is, in my opinion, one of the greatest and most prolific storytellers in children's literature.  Her willingness to share her own struggles with learning to read with her readers has made her a favorite of my students over the years.  (We were fortunate enough to have Ms. Polacco visit our school a few years back and it was certainly an experience I will never forget!)  This is a "teacher's book" in every sense of the word.  Like Miss Bonkers in Hooray for Diffendoofer Day!, the teacher in this story is one I aspire to be like!

3.  The Old Woman Who Named Things by Cynthia Rylant


What's not to love about a classy old lady who names every inanimate object from her chair, to her house, to her car?  The illustrations add to this lovely tale of a lonely old woman who befriends a small brown dog.  Her decision to NOT name the dog shows her fear of loss.  Friends pass away and leave her lonely and guarded.  This is truly my favorite Cynthia Rylant book!

4.  God Bless the Gargoyles by Dav Pilkey


For all the "potty humor" that Pilkey can inspire, God Bless the Gargoyles is truly a standout in Dav Pilkey's lineup.  At once stunning and sad, Pilkey weaves a beautiful, deep and dark poem about those who are misunderstood.  I have a very difficult time reading this aloud as it is so breathtaking and heartbreaking.  The artwork is dark and kind of Goth, but Pilkey also demonstrates his love of classic artwork with a nod towards Van Gogh's "Starry Night" and Edward Hopper's "Nighthawks" depicted in the book.  A gorgeous, gorgeous book...

(FYI:  Pilkey is a collector of gargoyles!)


(This final entry is a TIE...an absolute DEAD HEAT that even a flip of a coin cannot decide!)

5.  17 Things I'm Not Allowed to Do Anymore by Jenny Offill


Whether you are reading this book to yourself or to your students, you will find yourself shaking your head at the antics of the little girl in this book.  Written in a "list format," this book is a terrific springboard for creative writing in your classroom.  I love the mixed media approach Nancy Carpenter takes in the illustrations in this book.  A very fun read indeed!


AND 

The Sweetest Fig by Chris VanAllsburg  


VanAllsburg is hands-down, my all time favorite author!  It is so hard to narrow down my book choices without putting one of his picture books in the list!  The Sweetest Fig has a villain that you love to hate!  Bibot absolutely gets his "just desserts!"  Ending with a signature VanAllsburg twist, this is by far one of his most satisfying tales!


Well...there you have it, my five  six "Must Have Picture Books."  Join up with this linky at The Teacher Wife.  You'll be glad you did!


Technology Tuesday

I've been following Kathy Schrock for what seems like FOREVER!  A leading innovator in technology education, Kathy always seems to be on the cutting, BLEEDING edge of the great stuff that technology offers us in the classroom.  She's my hero in terms of all things "techie."

If you haven't ever checked out Kathy's site, click here.  Her "Guide to Everything" is just what it says it is.  I guarantee you'll bookmark her great ideas and refer to them over and over again!

I have always been an Apple Fanatic, and when the iPad came out, my sweetie pie hubby went out and bought one for our 20th wedding anniversary (PLUS the trip to IKEA and Chicago!)

Anywho...wading through the fun that is the world of the Apple App Store and browsing for endless days for the highest quality learning/sharing apps can be a bit daunting.

Enter the brilliant Kathy Schrock!  She not only provides you with an AMAZING list of apps for the iPad, but she organizes it according to Bloom's Taxonomy.  The entire webpage is on STERIODS!  This is serious info for serious tech users!


You've got to check this site out!  Just click on the image above and go directly to Kathy Schrock's Bloomin' iPad graphic.  The beauty of this is that all of the icons are functional and take you directly to the app for more info!  Do this on your iPad and you can automatically download these apps.  All are fantastic apps...no saccharine, sweet, and unfulfilling apps here...everything is absolutely MEATY!

For those of you who crave the apps on Androids...guess what?  She has a Bloomin' graphic for you too!  Google Apps more your speed?  She has one for Google Apps too!  (Guess you could say that Kathy Schrock is a bit of an overachiever!)

She even has a Web 2.0 graphic too!   Love this site to bitty bits...or byttie bytes!  Your choice!

Remember...sharing is caring, so pass this on to a techie sort of colleague.  They'll love you to pieces too!

I'm taking this and sharing it with my friends over at Technology Tailgate!  Join us over there for a great big serving of technology!  (Buns not included!)


Monday, July 16, 2012

Monday Made It #5


Holy cow!  Have I really posted five of these Monday Made Its?  Thanks to Tara over at 4th Grade Frolics for inspiring me to flex my creative muscles with these Monday Made Its!

I need to confess:  I'm really a tech geek that is always looking for great ways to use technology with my students.  However...whenever drill and skill (or drill and kill, whichever you prefer) is called for, I like activities to be "hands on" and manipulative.  I've noticed that my students are also drawn to these types of activities.  No worksheets for this girl and her crew...just paper to record on...YOU BETCHA!

I'm a huge fan of Working With Words, Word Work and Making Big Words...but I find that my students get a little bored with the paper and pencil stuff.  During Morning Meeting, I'll often put a word, letter by letter, on  index cards and have the group try to figure out what the "big word" is.  The kids like this a lot...and they love collaborating.  For kiddos with limited vocabulary, Making Big Words can be a little daunting. They are terrific at finding the "little words" and can be successful there while kiddos with more of a "big word picture" will enjoy being challenged to find the big word. Having classmates collaborate to find words inside of words as well as the big words tends to be more exciting, and in the end, more productive.


So...this past spring, I ran across these carrots and I had a really tough time passing these little cuties up.  I found them at the Dollar Tree before Easter, so they aren't out anymore.  However, you could probably find something similar and equally as clear, glossy and fun at other places.  You might even have a few of these in your own kid's Easter stash.  The SKU on these little honeys is:  3927768617.  I also got some of these at Michael's.  They come in packs of three and are so stinkin' cute, you'll probably want to pick a dozen or so!


I put together this activity:  Digging Up Words.  Click on the link to get a copy of the recording sheet, if you'd like.

Each sweet little carrot holds cut up index cards with single letters on each card.  The letters are then placed in the carrot and can be taken out and manipulated by the group.  The group  is challenged to look for the small words inside the big word.  In the end, you want them to find the BIG WORD that is made up of all the letters in the carrot.  Each carrot has a different word, so if your group finishes early, they can just grab a new carrot and dig up some more words.  I placed these in plastic flower pots with 12 carrots to each pot.  I also made a little "garden sign" with the title and instructions written on the back of the sign.  Pretty easy...and fun!  (Note that for "confusing letters" like d, p, q, b, I always put a dot in the bottom right hand corner to let the students know what the letter is.)


See if you can tell what the big word is...bragging rights go to the winner!

Have fun with this and remember...sharing is caring!  Make another pot for a colleague like "The Wonderful Linda!"

In the spirit of sharing, I'm also linking up with Classroom Freebies.  It's a first for me!


Tuesday, July 10, 2012

Technology Tuesday

I love, love, love, love LOVE my Smartboard to itty bitty pieces!  It is turned on at the start of every school day and it isn't turned off until the last little honey is long out the door.

I use it for everything...all the time.  The trick is to keep things interesting and yet...simple.  I do use my Smartboard's gallery features like the "timer."  However, these get old in a hurry.  The design style is predictable and, once I start the timer, the kids become so focused on how much time is left that they often neglect the really great super amazing task that I have planned.

Enter Steep It.  This is actually a tea timer that you can set for any amount of time.  Why would I use a tea timer?  (I actually am a huge hater of tea!)

Well...Steep It is very visual.  Yes, there is a numerical timer, but there is also visual feature that does appeal to my students.  As time passes, the color of the screen changes and gets DARKER, just like a cup of tea that is steeping.  Get it?   When time is up, a cheerful little ring (think Grandma's kitchen timer) goes off, signaling for the end of the task.

So...why not dash on over to http://steep.it/ and check this sweet little timer out for yourself?


Monday, July 9, 2012

Monday Made It #4


I don't know about you, but I've been taking a long hard look at what motivates my students and how to best "reward" kids...without being gratuitous.  I have never been a fan of the "blanket compliment," since it downplays what your hardest workers do while giving an unearned compliment to your slackers.  It doesn't do much for the kids in the middle either.

With the sheer volume of testing, benchmarks, baselines, and all things data, I have a tough time keeping everything straight.  With that being said, I do want my fourth graders to help me out by being accountable and by keeping track of this data in a way that is tangible and fun.  Ok...as fun as data can be!

So enter...The Common Core Standards Rewards Ring!


This is a combination of two separate programs that have caught my eye in the last 30 days...

Spirit Monkey Spirit Sticks 

I love the Spirit Sticks, lanyards, keychains and other fun items at Spirit Monkey!  Click on the image to check out their blog or follow them on Facebook.  Their fun approach to student rewards really has me excited and I'm going to pitch their program to my new principal.   

There are also the "I Can..." cards that can be found at the Teachers Notebook and Teachers Pay Teachers stores.  My favorite is the fourth grade math set that is found at Twins-Teaching and Tacos.  Check out her store!  There are some sweet little freebies and the items that are for sale are 
R E A S O N A B L E !


There are other teachers with similar ideas out there...far too many to name...but they have great ideas as well!

Anywho...I designed the Common Core Standards Rewards Ring as a way for the fourth graders at my school to keep track of their progress throughout the year...a magical combination of motivating and useful at the same time!


Start with the 2-inch binder ring.  Any larger than the 2-inch ring and pony beads no longer fit.  If you aren't a pony beads sort of person, pay no attention to this and buy the BIG HONKIN' binder rings!  (I believe that is the industry term for them!)

The VIP All Access Pass and the CCSS Mastery Chips are available below if you want a jumping off point.  I personally believe everyone can do MUCH BETTER than these, but, if you are a little unmotivated or wishing to store up your artsy-craftsy mojo for a better project, then be my guest.

I designed the VIP pass to work with pre-scored business card templates...but I think circle tags would be super-cute as well.  I printed the CCSS Mastery Chips on white cardstock and then cut them out using a 1 1/2 inch square punch from my scrapbooking stash.  A quick hole punch and you have really useful chips that have a place to write in your CCSS # or identifier.  I figured that blanks would be easier to work with and your students could take responsibility for writing in the numbers if they'd like.

If you look closely, you'll see that I used a neon guitar motif here...our school is doing a Rockstar theme for the 2012-2013 school year, so these match up quite nicely.  I'd certainly try to get my motif to match my classroom or school theme if I could...

Click here to find the guidelines that my teaching buddy and I will use as guidelines for the CCSSRR (love that acronym...don't you?).  Personalize to make this fit you and your classroom!

Lastly, I put all of the beads and punched out stars (punched from glitter cardstock in star shapes for extra fun) in a great little organizer that will keep everything together.  You can write with a silver or gold marker on the back of these, so writing your student's MAP scores on the back will allow your students to view their scores and keep track of their progress, right on the CCSSRR!  


Remember...sharing is caring, so make one for your teaching buddy or grade level partner(s).  "The Wonderful Linda" will be getting a set too...if I can make 1 set, I can certainly make 2!  So make another set...You'll be glad you did!

Bonus Monday Make It...for the home!  

Last year, the World's Sweetest Husband took me to IKEA for a little shopping on our 20th wedding anniversary...love this!  We were looking at a great display of black and white photography that they had set up.  Awesome photo layout...but no instructions and no hardware available for purchase.  Just the idea beautifully displayed.


The frames cost less than $3.00 each, so I bought 6.  They sat in my studio for about a year before I pulled them out recently and filled the frames with black and white photos from our trip to Yellowstone last summer.  My sweetheart of a husband helped me to put this together with hooks and eyes and I hung it from a wrought iron curtain rod.  It is above our fireplace and it's the first thing you see when you walk into our house.  I love it!


Sunday, July 8, 2012

Great Giveaway

Swing by my friend Jennifer's blog, Delighted in Second, and sign up for her really terrific giveaway!  She makes it super easy to score 7 entries.